


Before mixing any type of filler, the area to be filled, whether it be a small dimple or a previously straightened metal panel, must be thoroughly dry and free from wax, grease or dust. Check that the correct type of bodyfiller is being used for the metal surface, if it is galvanised or aluminium.
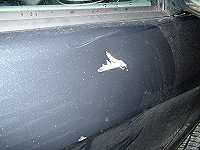
Remove existing paint and primer down to the metal surface over the whole area to be filled, using a powered grinder or sander where possible, to produce a rough surface for the filler to adhere to. Original factory baked finishes can be simply sanded with 80 -120 grit paper if the area to be filled is very small, but best adhesion is gained by stripping to bare metal for repairs larger than 5cm.
When power tools are not available use a coarse grade (40 grit) production paper to achieve the same effect. Close attention must be paid particularly to the outer edges of the repair area where the filler will need to be feathered out. If the surface is not thoroughly roughened it will be impossible to blend the filler properly into the surrounding panel without leaving an edge which will be very visible when the repair is painted. Finish the edges of the coarse sanded area with 120 - 180 grit paper to help prevent deep scratches at the edges of the repair which are easy to miss until the paint is applied.
If creases in the metal prevent the use of abrasives score the surface heavily with a file or screwdriver blade to ensure the bodyfiller adheres firmly to the panel.
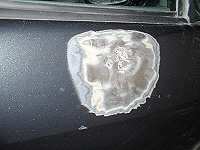
Mix the bodyfiller with the correct hardener according to the makers instructions, making sure it is well mixed and totally streak-free, preferably within 2-3mins to allow working time on the panel before it begins to set. Apply firmly to the repair, building up the surface until it is just a little proud of the surrounding panel to allow for sanding. Use two or three thinner applications if needed, rather than one deep layer, which is harder to apply smoothly and may sag before it sets. Sanding is not needed between coats of bodyfiller, but it is advisable to smooth off any spikes or really rough areas to make further applications easier.
Sanding and finishing bodyfiller to achieve a perfect surface
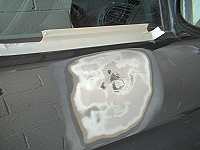
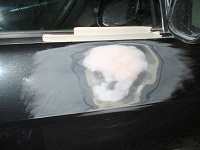
When the filler is hard (usually 15 -20 mins) sand into shape using 40-60grit production paper. Power sanders can speed up this part of the job but care must be taken not to remove too much of the filler, particularly if using rotary sanding disks. Final shaping is best done with a flat sanding block with abrasive paper attached. Sand in straight lines, changing direction regularly to avoid sanding low spots or grooves into the filler. For the same reason never sand in a circular motion as this removes filler too quickly from the same spot. Once the filler seems to be very near the required shape change to a finer grade paper, eventually finishing with 180 - 280 grit.
Unfortunately shaping bodyfiller is one part of the job that takes patience and a certain amount of practice to get perfect. Bodyfiller sanded to shape
Small pinholes and low spots are usually filled with `stopper', which is basically just a very fine filler. Polyester Stoppers are used in exactly the same way as bodyfiller, but are meant for use on smaller areas. Cellulose Stopper, or cellulose putty as it is sometime called, requires lengthy drying times between coats and is still prone to later sinkage. Very thin coats are an absolute must, with at least 30 mins between, preferably longer.
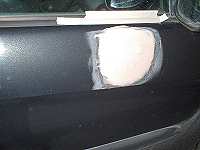
 Once the filler/stopper repair is satisfactory, final finishing before primer coats should be done using 240 grit WetorDry to remove the last of the deep sanding scratches, flatting finally with 320 grit, A useful trick is to spray a light coat of black or any dark colour (aerosols will do) onto the repair before moving on to the finer grades. This way as wet sanding is carried out, deep scratches or any remaining low spots will stand out clearly as the `guide coat' of dark paint is sanded off. It is much easier to put small defects right at this stage than to find them in the final coat of paint.
Use a rubbing block at all stages, otherwise the surface will have faint ripples which will not show until painted.
-